
Jar cakes, also known as cake in a jar, are individual-sized layered desserts served in glass jars. They’re perfect for gifting, party favors, picnics, or selling, thanks to their charm, convenience, and the fact that they look as good as they taste.
This article will teach you how to make beautiful and delicious jar cakes from scratch, including tips for assembly, flavor variations, storage, and presentation. Whether you’re planning a wedding favor, starting a small business, or surprising a friend, jar cakes are the perfect solution.
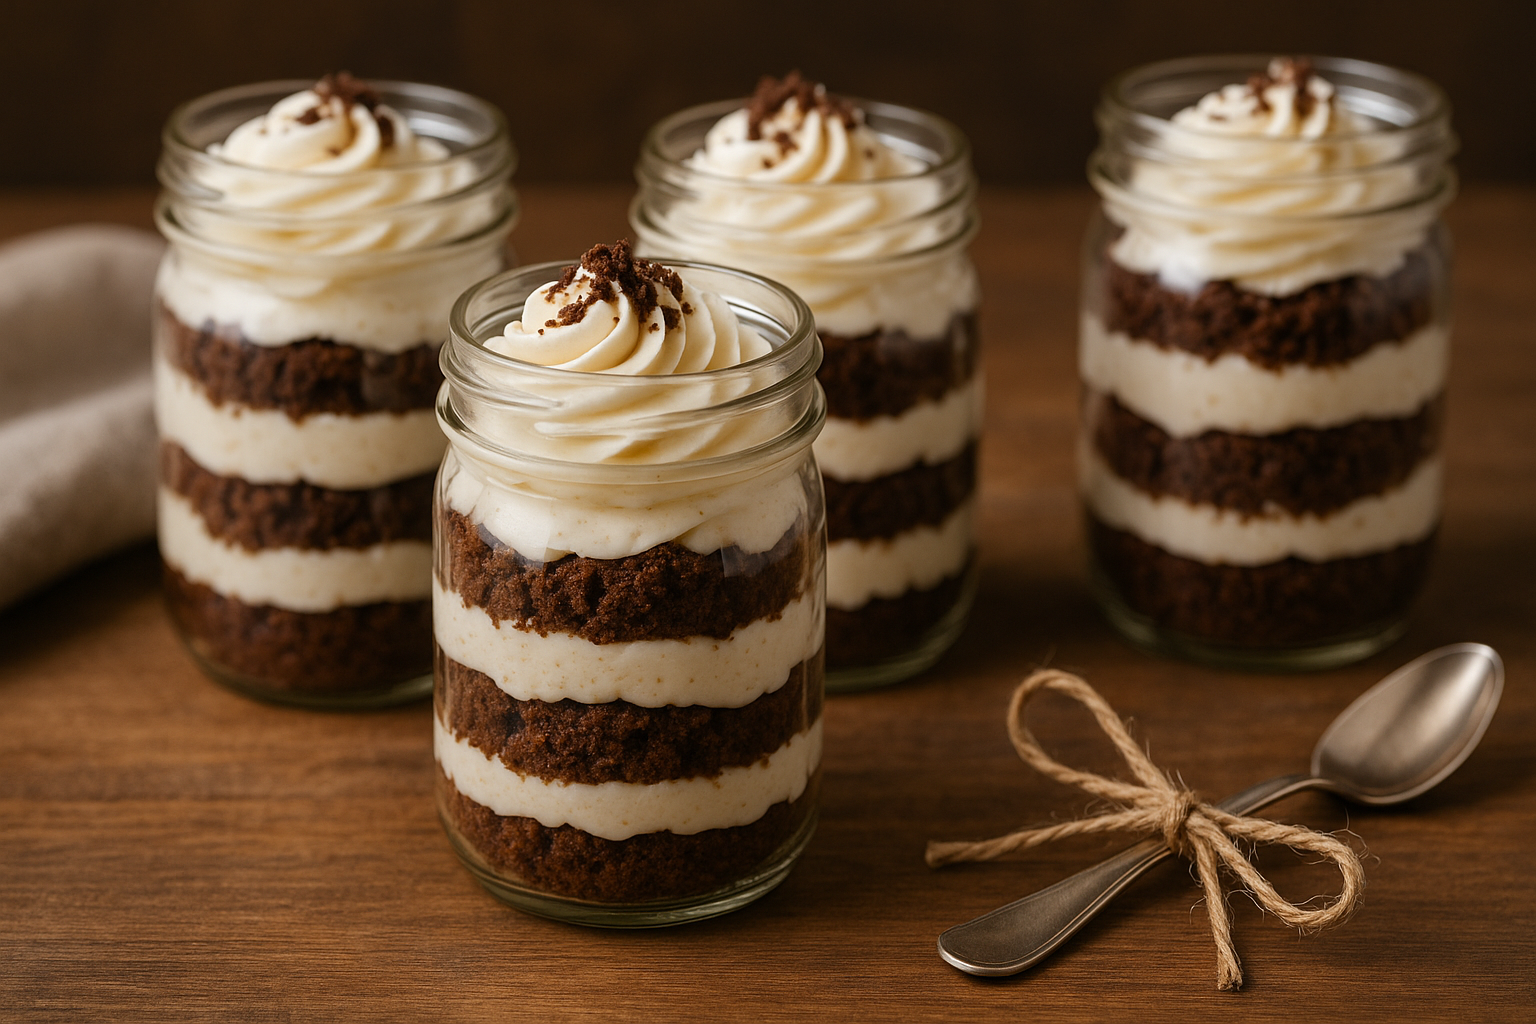
Why Jar Cakes Are So Popular
Jar cakes combine three irresistible qualities:
- Aesthetic appeal – visible layers of cake, cream, and filling are visually striking.
- Portability – they’re sealed, travel-friendly, and easy to store or gift.
- Customization – you can use any flavor combination, from chocolate to lemon to red velvet.
They’re also:
- Mess-free (no slicing needed)
- Great for portion control
- Perfect for kids and adults alike
Supplies You’ll Need
To get started, you’ll need:
- Mason jars or glass containers (4–8 oz size recommended)
- A piping bag or spoon (for layering cream and fillings)
- Small spatula or spoon (for assembly)
- Labels or ribbons (for gifting or selling)
- Cake and cream/frosting (homemade or store-bought)
Tip: Use wide-mouth jars for easier layering.
Choosing the Right Jar
Not all jars are equal. Consider these when choosing:
- Size: 4 oz jars are great for samples or favors; 8 oz jars are ideal for full servings.
- Mouth Width: Wide-mouth jars make assembly and eating easier.
- Material: Glass is elegant, reusable, and eco-friendly.
- Lid Style: Screw-on lids help with freshness; decorative lids are great for gifts.
Avoid jars with narrow necks or odd shapes that make layering difficult.
Step-by-Step: How to Make a Jar Cake
1. Bake the Cake
Choose any cake flavor you like (chocolate, vanilla, red velvet, lemon, etc.). You can bake it in a sheet pan for thinner layers or in a standard cake pan and slice it thin.
Let the cake cool completely before cutting into small rounds or cubes.
Pro tip: Use a cookie cutter the size of your jar opening to get perfect rounds.
2. Make or Prepare the Filling
This can be buttercream, whipped cream, ganache, cream cheese frosting, mousse, or even pudding. For added flavor, prepare complementary layers like:
- Fruit compotes
- Chocolate sauce or caramel
- Jam or curd
- Cookie crumbs or crushed nuts
The key is to balance textures and flavors. Avoid using overly wet components that may turn the cake soggy.
3. Assemble the Layers
Now comes the creative part. Alternate layers of:
- Cake – either a round slice or crumbled
- Filling – piped for neatness
- Extras – like fruit, ganache, nuts, or jam
Repeat until the jar is nearly full. Finish with a decorative topping: whipped cream, chocolate shavings, sprinkles, a berry, or a drizzle.
Don’t overfill — leave about 1 cm at the top for closing the lid without mess.
4. Seal and Store
Seal each jar tightly with a lid. Store in the refrigerator if using cream or perishable fillings. Jar cakes generally keep well for:
- 3–4 days refrigerated
- 1 day at room temperature (only if using shelf-stable fillings)
Best Cake Flavors for Jar Cakes
Here are some crowd-pleasing and creative combos:
Chocolate Lovers Jar
- Chocolate cake
- Chocolate ganache
- Chocolate whipped cream
- Crushed Oreos
Red Velvet Delight
- Red velvet cake
- Cream cheese frosting
- White chocolate shavings
Lemon Berry Burst
- Lemon cake
- Whipped cream
- Raspberry jam
- Fresh berries
Carrot Cake Jar
- Carrot cake
- Cream cheese frosting
- Chopped walnuts
S’mores in a Jar
- Chocolate cake
- Toasted marshmallow cream
- Crushed graham crackers
- Chocolate ganache
Tropical Paradise
- Coconut cake
- Pineapple compote
- Coconut whipped cream
Presentation Tips (Especially for Gifts)
Jar cakes are a visual dessert, so presentation matters. Here’s how to make yours stand out:
- Use clear jars to show the layers
- Add ribbon or twine around the lid for rustic charm
- Create custom labels with flavor, date, or recipient’s name
- Attach a spoon to make it ready-to-eat
- Use washi tape or stickers for a playful look
You can also design themed tags for birthdays, holidays, or weddings.
Selling Jar Cakes (Home Business Tips)
If you’re thinking of turning jar cakes into a small business, consider the following:
- Calculate cost per unit (ingredients + jar + packaging + time)
- Ensure proper hygiene and storage
- Design attractive labels (with flavor, ingredients, expiry date)
- Offer variety boxes or custom orders
- Use social media for promotion (great for visual platforms like Instagram)
Be sure to comply with local health regulations for selling homemade food products.
Jar Cake Troubleshooting
My cake is sliding or messy:
Let it cool fully before layering. Use slightly firmer frosting or fillings to hold the shape.
It’s too soggy:
Avoid over-soaking with fruit or syrup. Use protective frosting layers between cake and wet ingredients.
Tastes bland:
Make sure each component is well-flavored. A little citrus zest or salt in frosting goes a long way.
Make-Ahead and Storage
Jar cakes are a great make-ahead dessert. Here’s how to manage prep:
- Cake layers can be baked and frozen for up to a month.
- Frosting can be stored in the fridge for 3–5 days.
- Assembled jars are best eaten within 2–3 days if refrigerated.
Tip: Avoid whipped cream if you’re storing for more than 24 hours — use stabilized cream or buttercream.
Dietary Variations
You can easily modify jar cakes to fit dietary preferences:
- Vegan: Use plant-based cake and coconut whipped cream
- Gluten-Free: Use GF flour blends or almond flour-based cakes
- Low-Sugar: Use natural sweeteners like honey or stevia
- Keto: Use almond or coconut flour cake and keto whipped cream
Final Thoughts: Small Cakes, Big Impact
Jar cakes are more than just a trendy dessert — they’re practical, beautiful, and endlessly customizable. Whether you’re making a single batch for a friend or dozens for an event, they offer a unique way to serve cake without stress or slicing.
From cozy home gifts to elegant wedding favors, jar cakes check every box: flavor, presentation, portion control, and convenience. Once you try them, you’ll wonder why you ever made cake any other way.